Budget Studio Setup for New Podcasters
Starting a podcast often involves a mix of creativity and technical considerations. For those new to the medium, the prospect of setting up a recording space can seem overwhelming, especially when faced with a wide range of equipment options and varying price points. However, it is possible to create a functional and affordable studio without compromising on audio quality. This article outlines a practical approach to building a budget-friendly podcast studio, focusing on essential gear such as a USB microphone, acoustic panels, and free editing software.
The goal is to provide a clear overview of the components involved and how they work together. By understanding the role of each element, new podcasters can make informed decisions that align with their goals and resources. Whether recording in a dedicated room or a shared living space, the principles of sound capture and treatment remain consistent. With careful planning, a suitable recording environment can be established at a modest cost.
It is important to note that the effectiveness of any setup depends on multiple factors, including the room’s characteristics, the podcaster’s voice, and the recording techniques used. This article does not guarantee specific results but rather offers a framework for approaching the process. By focusing on method and context, individuals can adapt the recommendations to their unique circumstances.
Assessing Your Recording Environment
Before acquiring any equipment, it is helpful to evaluate the space where recording will take place. Rooms with hard surfaces such as bare walls, uncarpeted floors, and large windows can cause sound reflections that may affect audio clarity. Identifying these characteristics allows for targeted adjustments. For instance, a room with many soft furnishings like curtains, rugs, and upholstered furniture may already have some natural sound absorption. In contrast, a minimalist room might require additional treatment.
Consider the level of ambient noise in the environment. External sounds from traffic, neighbors, or appliances can interfere with recordings. While not all noise can be eliminated, understanding its sources can guide mitigation strategies. For example, recording during quieter times of day or using temporary solutions like blankets over windows may help reduce unwanted sound. The goal is to create a controlled acoustic space that supports clear voice capture.
It is also useful to think about the size and layout of the room. Smaller spaces tend to have more pronounced reflections, while larger rooms may have longer reverb times. However, the impact varies depending on the materials present. A walk-through with a critical ear—clapping hands or speaking aloud—can reveal how sound behaves in the space. This informal assessment can inform decisions about microphone placement and acoustic treatment.
Finally, consider the practical aspects of recording in the chosen space. Is there access to power outlets? Is the area free from distractions? Will the setup need to be portable or permanent? These factors influence equipment choices and the overall workflow. By starting with a thorough assessment, new podcasters can avoid unnecessary purchases and focus on solutions that address specific needs.
Essential Gear: USB Microphone and Accessories
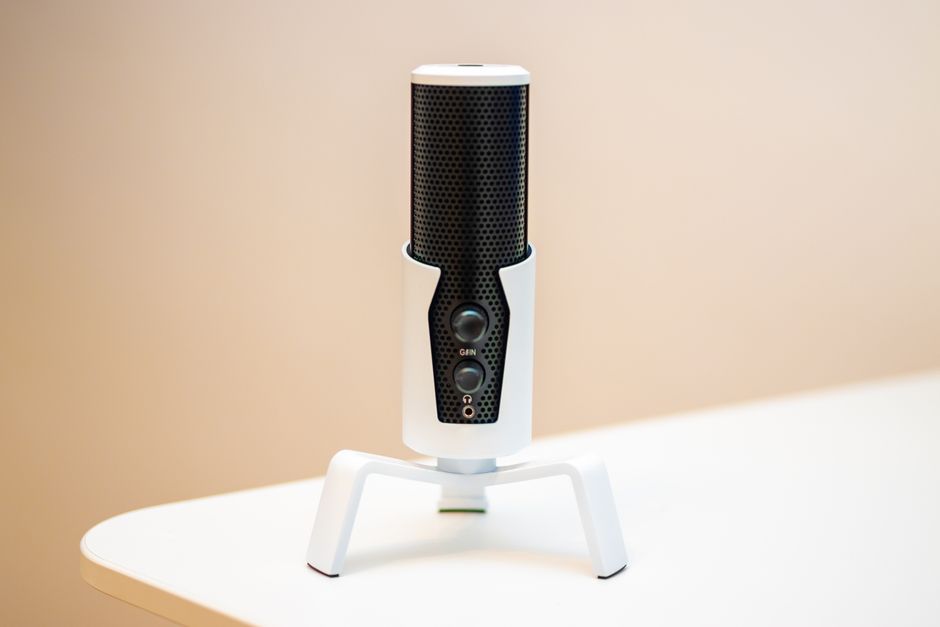
The microphone is a central component of any podcasting setup. For beginners, a USB microphone offers a convenient and cost-effective option. Unlike XLR microphones, which require an audio interface, USB microphones connect directly to a computer via a USB port. This simplifies the setup and reduces the need for additional equipment. Many USB microphones are available at various price points, and some models include features such as headphone jacks for monitoring and gain control knobs.
When selecting a USB microphone, consider the pickup pattern. Cardioid patterns are common and capture sound primarily from the front, which helps minimize background noise. Omnidirectional patterns pick up sound from all directions and may be less suitable for solo recording in untreated rooms. Additionally, check the microphone’s frequency response and sensitivity to ensure it suits the human voice. Reading reviews and listening to sample recordings can provide insight into how a microphone performs in real-world conditions.
Beyond the microphone, a few accessories can enhance the recording experience. A pop filter helps reduce plosive sounds (like ‘p’ and ‘b’ sounds) that can cause distortion. A shock mount isolates the microphone from vibrations and handling noise. While some USB microphones come with built-in pop filters and shock mounts, others may require separate purchases. These accessories are generally affordable and can be added over time.
A pair of closed-back headphones is also recommended for monitoring audio during recording. This allows the podcaster to hear how they sound and catch any issues in real time. Headphones do not need to be expensive; basic models with a flat response can suffice for beginners. Finally, a microphone stand or boom arm positions the microphone at an appropriate distance and angle, reducing the need to hold it and minimizing handling noise.
Acoustic Treatment on a Budget
Acoustic treatment aims to manage sound reflections within a room. While professional acoustic panels can be costly, there are budget-friendly alternatives that can be effective. The primary goal is to reduce early reflections that can cause echo and coloration of the voice. Common solutions include using thick moving blankets, acoustic foam tiles, or DIY panels made from mineral wool and fabric.
Placement of treatment materials is key. First reflection points—areas where sound from the mouth reflects off surfaces and reaches the microphone—are critical. These are typically the walls to the sides, behind the microphone, and above. In a small room, covering these areas with absorptive material can significantly improve clarity. However, covering every surface is not necessary and may lead to an overly dead sound. A balance is needed.
For those in shared living spaces, temporary solutions are available. Portable vocal booths or reflection filters can be placed behind the microphone to reduce reflections. These devices are often more affordable than full room treatment and can be stored when not in use. Alternatively, recording in a closet filled with clothes can provide natural absorption, though ventilation and comfort should be considered.
It is important to note that acoustic treatment is different from soundproofing. Treatment manages sound within the room, while soundproofing prevents sound from entering or leaving. For most podcasters, treatment is the priority. Soundproofing may be necessary in high-noise environments, but it often involves structural changes that are not feasible for renters or those on a tight budget.
When selecting materials, consider fire safety and durability. Some inexpensive foams may not meet safety standards, so checking product specifications is advisable. DIY options using materials like Owens Corning 703 fiberglass boards wrapped in fabric can be cost-effective and perform well, but require some construction effort. Ready-made panels from brands like Auralex or Foam Factory offer convenience at varying prices.
Free Editing Software Options
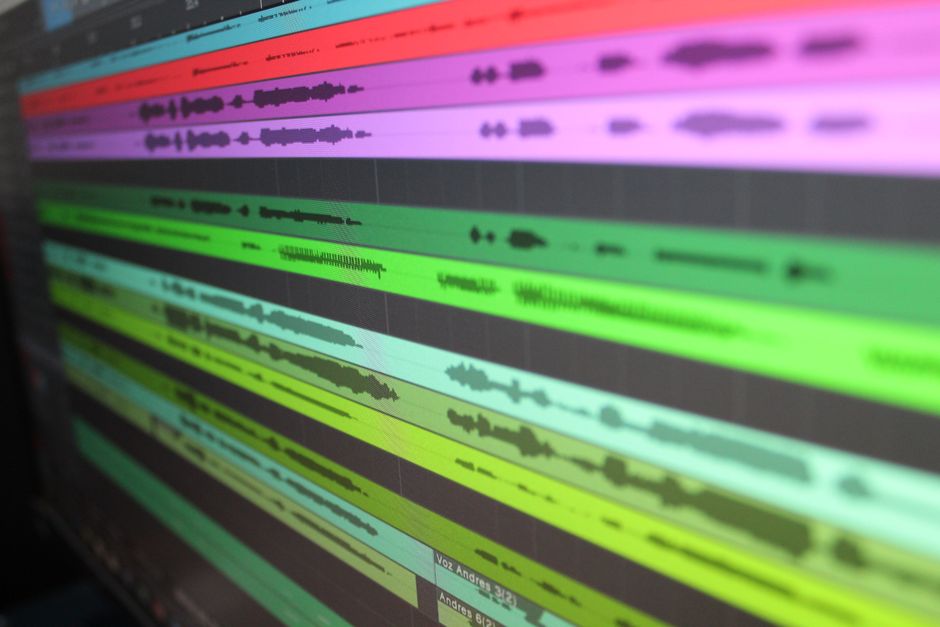
Once recording is complete, editing software is needed to polish the audio. Fortunately, several free options exist that cater to beginners and offer a range of features. Audacity is a popular open-source program available for Windows, macOS, and Linux. It supports multi-track recording and editing, noise reduction, and a variety of effects. While its interface may seem dated, it is functional and widely supported by tutorials.
Another option is GarageBand, which comes pre-installed on macOS and iOS devices. It provides a user-friendly interface with podcast-specific templates, including features like voice presets and automatic level adjustment. For Windows users, Reaper offers a free evaluation period and a low-cost license for continued use. It is a powerful digital audio workstation (DAW) that can handle complex projects, though it may have a steeper learning curve.
Ocenaudio is a cross-platform, easy-to-use audio editor suitable for quick edits. It supports VST plugins and offers real-time preview of effects. For those who prefer online tools, platforms like TwistedWave and AudioMass provide browser-based editing without the need for installation. However, online tools may have limitations on file size and require a stable internet connection.
When choosing software, consider the specific tasks needed: cutting unwanted sections, removing background noise, adjusting levels, and adding intro/outro music. Most free software can handle these tasks. It is also beneficial to check the availability of tutorials and community support, as this can ease the learning process. Regardless of the software chosen, practicing with sample recordings can help build familiarity before working on important content.
Putting It All Together
With the essential components in place, the next step is to integrate them into a cohesive setup. Begin by connecting the USB microphone to the computer and configuring it as the input device in the operating system’s sound settings. Adjust the microphone gain to achieve a healthy recording level—peaks around -12 dB to -6 dB are often recommended to avoid clipping. Use headphones to monitor while speaking and make adjustments as needed.
Position the microphone at a consistent distance, typically 6 to 12 inches from the mouth, and slightly off-axis to reduce plosives. Speak naturally and maintain a steady volume. If using a boom arm, adjust it to avoid vibrations. Conduct a test recording and listen back to identify any issues such as background hum, room echo, or uneven levels. Make note of any adjustments required.
For editing, import the recorded audio into the chosen software and perform basic cleanup: trim silences, remove mistakes, and apply noise reduction if necessary. Add intro and outro music, ensuring that the music is royalty-free or properly licensed. Export the final file in a suitable format, such as MP3 or WAV, and check the file size and quality. Finally, distribute the episode through a podcast hosting platform, which will generate an RSS feed for listeners.
It is worth reiterating that the setup described is a starting point. As skills and needs evolve, upgrades can be considered. However, for those just beginning, this budget-friendly approach provides a solid foundation. Podcast Pioneers may offer additional resources and community support for those looking to explore podcasting further. By focusing on the fundamentals and maintaining a willingness to learn, new podcasters can create content that resonates with their audience.