Editing Workflow for Efficient Podcast Production
Editing a podcast involves a series of technical and creative decisions that shape the final listening experience. An efficient workflow helps maintain consistency across episodes while reducing the time spent on repetitive tasks. This article outlines a step-by-step process that covers noise reduction, cutting filler words, adding music beds, and exporting episodes for publishing. The approach is designed to be adaptable, allowing podcasters to adjust based on their specific needs and resources.
Podcast Pioneers recognizes that every production environment is unique. Factors such as recording equipment, room acoustics, and the host’s speaking style influence how editing tasks are prioritized. The following workflow is not a rigid prescription but a flexible framework. It emphasizes methodical stages that can be customized to fit different genres and formats. By understanding the purpose of each step, editors can make informed choices that align with their goals.
Before diving into the process, it is important to note that outcomes depend on multiple variables. These include the quality of the raw recording, the editor’s skill level, and the software used. No single approach guarantees a specific result. Instead, this workflow aims to provide a structured path that promotes clarity and efficiency. With that in mind, let’s explore the key stages of podcast editing.
Preparing the Session and Organizing Assets
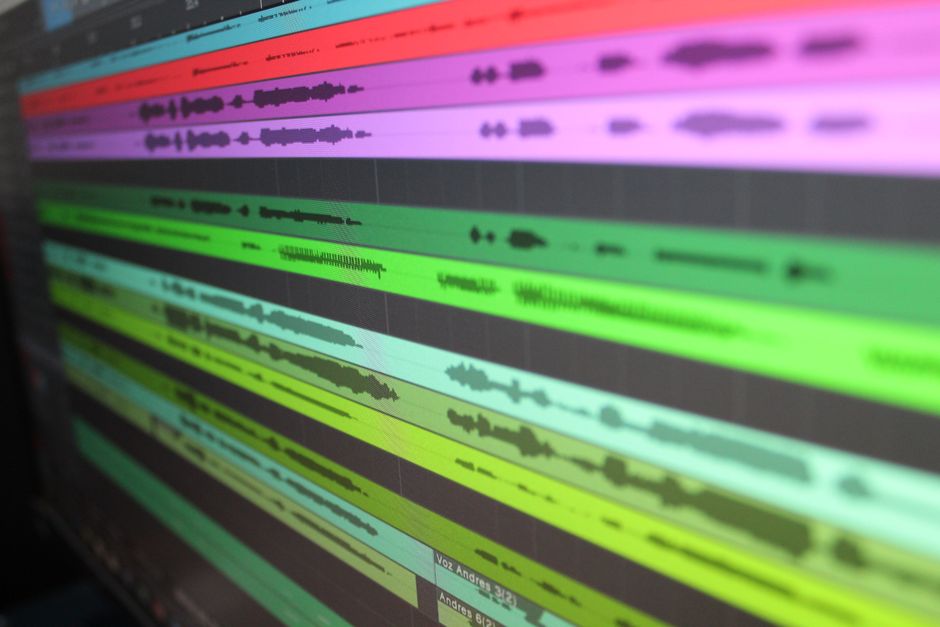
The first step in any editing workflow is setting up a well-organized session. This involves importing all recorded audio files into the editing software and arranging them on separate tracks. For example, the host’s microphone track, guest tracks, and any pre-recorded segments should be placed on individual channels. This separation allows for independent processing and makes it easier to apply adjustments later. Additionally, creating a backup of the original files is a prudent practice. Should any editing errors occur, the raw material remains intact.
Once the files are imported, it is helpful to label tracks clearly. Use descriptive names such as ‘Host Mic,’ ‘Guest 1,’ or ‘Intro Music.’ This simple step saves time when navigating the session, especially during complex edits. Organizing assets also includes gathering any sound effects or music beds that will be used. Placing these elements in a dedicated folder or track group ensures they are readily accessible. A tidy session layout reduces the risk of confusion and helps maintain focus on the creative aspects of editing.
Another consideration is setting the sample rate and bit depth for the project. Most podcasts use 44.1 kHz or 48 kHz sample rates, with 24-bit depth for recording and editing. These settings should match the recording format to avoid unnecessary conversions. While some editors prefer to work at higher resolutions, the difference may not be perceptible in the final output. Consistency across episodes is more important than chasing technical extremes. By establishing a standard session template, podcasters can streamline future projects.
Noise Reduction and Audio Cleanup
Noise reduction is often the first processing step after organizing the session. Background noise, such as hums, clicks, or room reflections, can distract listeners and reduce overall clarity. Many editing software programs include noise reduction tools that analyze a sample of the noise profile and then subtract it from the entire track. The key is to apply these tools subtly. Over-processing can introduce artifacts that make the audio sound unnatural. A common approach is to reduce noise by a moderate amount, then listen critically to ensure the voice remains natural.
In addition to broadband noise reduction, targeted cleanup may be necessary. For instance, plosives—those popping sounds from ‘p’ or ‘b’ consonants—can be mitigated with a high-pass filter or a dedicated de-plosive tool. Similarly, sibilance (harsh ‘s’ sounds) can be tamed with a de-esser. These tools should be used judiciously, as excessive processing can dull the voice. If the recording environment is particularly noisy, it may be worth investing in acoustic treatment or a better microphone before relying solely on software fixes.
Another aspect of cleanup is removing unwanted segments, such as coughs, chair squeaks, or off-topic chatter. This can be done manually by cutting and deleting those sections. However, it is important to maintain natural pacing. Cutting too aggressively can make the conversation sound choppy. A good rule of thumb is to remove only clear distractions and leave slight imperfections that contribute to authenticity. After cleanup, it is advisable to listen to the entire track once more to catch any remaining issues.
Cutting Filler Words and Refining Pacing
Filler words such as ‘um,’ ‘uh,’ and ‘you know’ are common in spontaneous speech. While they can add a conversational tone, excessive use may hinder comprehension. The process of cutting filler words involves identifying and removing these interjections without disrupting the flow of sentences. Some editors prefer to do this manually, using waveform visualization to spot gaps or repetitive sounds. Others use automated tools that detect and mark filler words for review. Automated tools can speed up the process, but manual oversight is still recommended to avoid cutting essential words.
When cutting filler words, it is crucial to preserve the speaker’s natural rhythm. Removing every single ‘um’ can make the speech sound robotic. A balanced approach is to target only the most noticeable ones, especially those that interrupt the flow of a sentence. Additionally, pay attention to pauses. Long silences can be trimmed, but short pauses often enhance emphasis and give listeners time to absorb information. The goal is to create a polished yet organic listening experience.
Beyond filler words, refining pacing may involve tightening the conversation. This could mean shortening overly long tangents or reordering segments for better narrative flow. However, such edits should be done with care, as they can alter the meaning or tone. It is often helpful to take a break before making these decisions, as fresh ears can better judge what needs adjustment. Collaboration with co-hosts or producers can also provide valuable perspectives. Once satisfied, the edited track can be rendered or moved to the next stage.
Adding Music Beds and Sound Elements
Music beds and sound effects can enhance a podcast’s production value when used appropriately. A music bed is a continuous piece of background music that plays under the voice, typically during introductions, transitions, or outros. The key is to choose music that complements the content without overpowering the speech. Licensing is an important consideration; using copyrighted music without permission can lead to legal issues. Therefore, it is advisable to use royalty-free tracks or original compositions. Podcast Pioneers suggests maintaining a library of cleared music for consistent use across episodes.
When adding a music bed, volume balancing is critical. The music should sit well below the voice, usually at a level where it is audible but not distracting. Many editors use automation to duck the music when the host speaks, a technique that automatically lowers the music volume. This can be done manually or with sidechain compression. Fade-ins and fade-outs should be smooth to avoid abrupt starts or stops. A gradual fade at the beginning and end of a segment helps the transition feel natural.
Sound effects, such as whooshes or stingers, can be used to punctuate transitions or highlight key moments. However, overuse can make the podcast sound cluttered. It is best to use them sparingly and consistently. For instance, a specific sound might signal the start of a new segment. This creates a familiar auditory cue for regular listeners. As with music, ensure that any sound effects are properly licensed. After adding these elements, listen to the mix on different playback systems—headphones, speakers, and earbuds—to ensure the balance holds up across devices.
Exporting and Publishing the Final Episode
The final stage of the editing workflow is exporting the completed episode in a suitable format for publishing. Before export, it is wise to do a final quality check. Listen to the entire episode from start to finish, paying attention to any remaining issues such as sudden volume changes, digital artifacts, or unintended silence. If everything sounds good, proceed to export. Common export settings for podcasts include MP3 format at 128 kbps or higher, or AAC format. The choice depends on the hosting platform’s requirements and the desired file size.
Metadata is an essential part of the export process. This includes the episode title, description, and ID3 tags such as artist, album, and genre. Proper metadata helps with organization and searchability. Many hosting platforms allow you to input this information directly, but embedding it in the file ensures it travels with the audio. Additionally, normalize the audio to a standard loudness level, such as -16 LUFS for stereo or -19 LUFS for mono, to provide a consistent listening experience across episodes. However, be aware that different platforms may apply their own normalization.
After export, upload the file to your podcast hosting service. From there, you can schedule the release date and distribute to directories like Apple Podcasts and Spotify. It is good practice to archive the final project file and exported audio for future reference. This allows for re-editing or creating promotional clips if needed. Finally, promote the episode through your usual channels. By following a consistent workflow, each episode can be produced efficiently while maintaining a professional standard. Remember that the process may require adjustments based on feedback and evolving goals.