How to Choose Your First Podcast Microphone
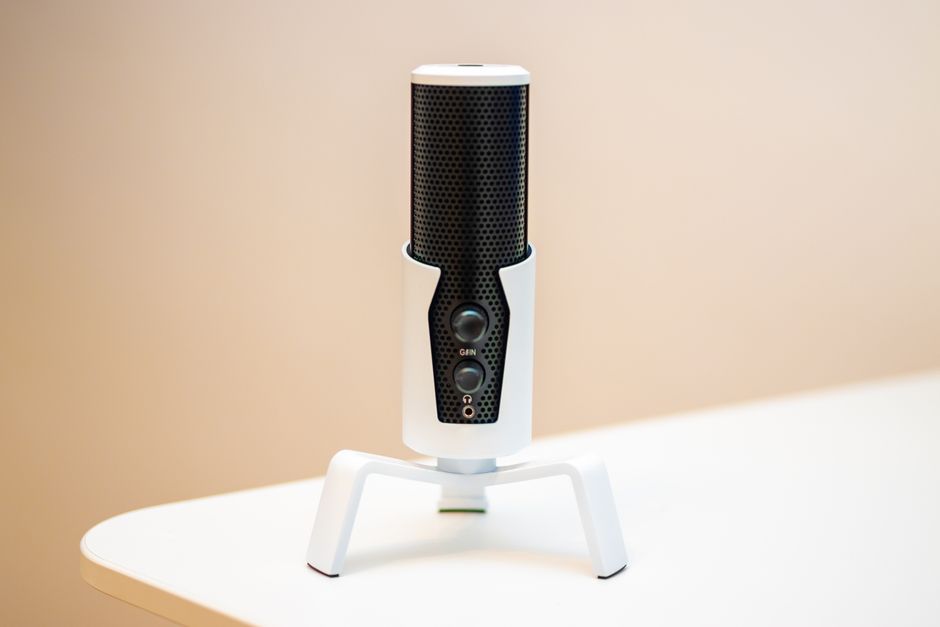
Selecting your first podcast microphone involves evaluating several technical and practical factors. The microphone you choose can affect the character of your recordings, but it is only one part of a larger signal chain that includes your recording environment, audio interface, and recording software. Understanding the differences between microphone types, connection methods, and price points helps you make an informed decision that aligns with your specific needs.
This article examines the key considerations when choosing a podcast microphone, focusing on dynamic versus condenser microphones, USB versus XLR connections, and budget-friendly options. It also discusses how your recording space influences microphone performance. The goal is to provide a framework for comparing options, not to prescribe a single best choice, as the ideal microphone depends on multiple variables unique to each podcaster.
By the end, you will have a clearer picture of the trade-offs involved and be better equipped to select a microphone that fits your recording setup, experience level, and production goals. Keep in mind that no single microphone guarantees professional results; factors such as room acoustics, microphone technique, and post-processing also play significant roles.
Dynamic vs. Condenser Microphones
Dynamic microphones are known for their durability and ability to handle high sound pressure levels. They typically have a moving coil diaphragm that is less sensitive than condenser designs. This lower sensitivity can be advantageous in untreated rooms because dynamic mics tend to pick up less ambient noise and room reflections. They are often used in live sound and broadcast applications, and many podcasters find them well-suited for home studios with less-than-ideal acoustics.
Condenser microphones, on the other hand, use a capacitor design that is more sensitive and can capture a wider frequency range with greater detail. This sensitivity makes them ideal for capturing nuanced vocals in a controlled environment, such as a treated studio. However, in a noisy or reverberant room, a condenser microphone may pick up unwanted background sounds, leading to a less clean recording. Some condenser microphones require phantom power, which is provided by an audio interface or mixer.
When deciding between dynamic and condenser, consider your recording space. If you record in a quiet, acoustically treated room, a condenser microphone can deliver detailed audio. If your space has background noise or untreated walls, a dynamic microphone may be more forgiving. Additionally, dynamic microphones often have a cardioid pickup pattern that rejects off-axis sound, which can help isolate your voice.
It is also worth noting that some microphones combine features, such as USB condensers with adjustable gain. However, the fundamental differences in sensitivity and transient response remain. Your choice should reflect the balance you need between audio detail and noise rejection. There is no universally superior type; each has contexts where it excels.
USB vs. XLR Connections
USB microphones are popular among beginners because they are easy to set up. They contain an internal analog-to-digital converter, allowing you to connect directly to a computer without additional equipment. This simplicity makes USB microphones a convenient option for solo podcasters or those who want a minimal setup. Many USB microphones also include headphone jacks for direct monitoring and gain controls, though these features vary by model.
XLR microphones, by contrast, require an audio interface or mixer to connect to a computer. XLR is a professional-standard connector that carries an analog signal. This setup offers greater flexibility and scalability: you can upgrade components individually, use multiple microphones, and take advantage of better preamps and converters. XLR microphones are often preferred in multi-person podcasts or studio environments where audio quality and expandability are priorities.
The choice between USB and XLR depends on your workflow and future plans. If you value portability and simplicity, USB may be sufficient. If you anticipate growing your podcast and wanting more control over your sound, investing in an XLR setup might be more suitable. However, XLR setups typically involve higher initial costs because you need both a microphone and an interface.
Another consideration is that some USB microphones offer XLR outputs as well, providing hybrid functionality. But these are less common. For most beginners, the decision often comes down to whether you prefer an all-in-one solution or are willing to manage separate components. Neither path is inherently better; they simply cater to different needs and preferences.
Assessing Your Recording Space
Your recording space has a significant impact on microphone performance. Hard surfaces such as bare walls, floors, and windows can cause sound reflections that lead to echo and a boxy sound. Soft furnishings, carpets, curtains, and acoustic panels can absorb these reflections. Before choosing a microphone, evaluate your room’s acoustics. A dynamic microphone may help mitigate some room issues, but it cannot eliminate them entirely.
If you record in a small, untreated room, consider using a dynamic microphone with a tight cardioid pattern to reduce pickup of reflected sound. Alternatively, you could treat your space with affordable solutions like moving blankets, bookshelves, or dedicated acoustic foam. Even a closet full of clothes can serve as a makeshift vocal booth. The goal is to reduce the ratio of reflected sound to direct sound reaching the microphone.
For those with a well-treated room, a condenser microphone can capture more detail without picking up excessive room tone. However, even in a treated room, microphone placement and orientation matter. Positioning the microphone close to your mouth (about 6–12 inches) and using a pop filter can reduce plosives and improve clarity. Experimentation with placement often yields better results than simply upgrading equipment.
It is also worth considering the noise floor of your environment. If you have a noisy computer fan, air conditioner, or street traffic, a less sensitive microphone may be beneficial. Some podcasters use dynamic microphones specifically to minimize such background noise. In any case, addressing the room first can make a bigger difference than the microphone itself.
Budget Considerations and Options
Podcast microphones are available at various price points, from under $50 to several hundred dollars. Budget-friendly options often include USB microphones from brands like Blue, Audio-Technica, and Samson. These can be adequate for beginners, though they may have limitations in build quality or audio fidelity. It is possible to produce a listenable podcast with an inexpensive microphone, especially if you optimize your recording environment and apply post-processing.
Mid-range microphones, typically $100–$300, offer better components and durability. In this range, you can find both dynamic and condenser models, as well as USB and XLR options. For example, the Audio-Technica ATR2100x is a hybrid USB/XLR dynamic microphone that is often recommended for beginners. The Shure SM58 and SM7B are dynamic XLR microphones popular in broadcasting. Condenser options like the Audio-Technica AT2020 (XLR) and Blue Yeti (USB) are also common choices.
When setting a budget, remember to account for additional gear if you choose XLR. An audio interface can cost $100–$200, and you may need cables and a stand. USB microphones usually include necessary cables. Also, consider whether you need a boom arm, shock mount, or pop filter, as these can add to the total cost. It is often better to allocate a portion of your budget to room treatment than to spend it all on a high-end microphone.
There is no need to spend a lot initially. Many podcasters start with affordable gear and upgrade as their skills and needs evolve. The key is to choose a microphone that matches your current setup and allows for growth. If you are unsure, reading reviews and watching demonstrations can help you understand how different microphones sound. Podcast Pioneers offers resources and community insights that can assist in your decision-making process.
“The best microphone for you is the one that fits your voice, your room, and your workflow.”
Making Your Decision
To summarize, choosing your first podcast microphone involves balancing several factors: microphone type, connection method, room acoustics, and budget. Start by assessing your recording environment. If it is noisy or untreated, a dynamic microphone with a cardioid pattern may be a practical choice. If you have a quiet, treated space, a condenser microphone can capture more detail.
Next, decide between USB and XLR based on your need for simplicity versus expandability. USB is convenient for solo podcasters, while XLR offers more flexibility for multi-person setups or future upgrades. Set a realistic budget that includes any necessary accessories, and remember that room treatment can significantly improve audio quality regardless of microphone choice.
Finally, consider trying before buying if possible. Many retailers have return policies, and some manufacturers offer trial periods. Listening to sample recordings of microphones can also provide insight. Keep in mind that microphone technique, such as speaking at a consistent distance and angle, often matters more than the microphone itself. With careful consideration, you can select a microphone that serves your podcasting journey well.